You are seeing this message because we have detected you are using Internet Explorer 10 (or older) to browse our site. Unfortunately, this means that your browser is too old to display our site properly and that certain areas of the site may display incorrectly or not at all. Please upgrade to the latest version of Google Chrome, Mozilla Firefox, Internet Explorer, Microsoft Edge, or Apple Safari in order to view this site.
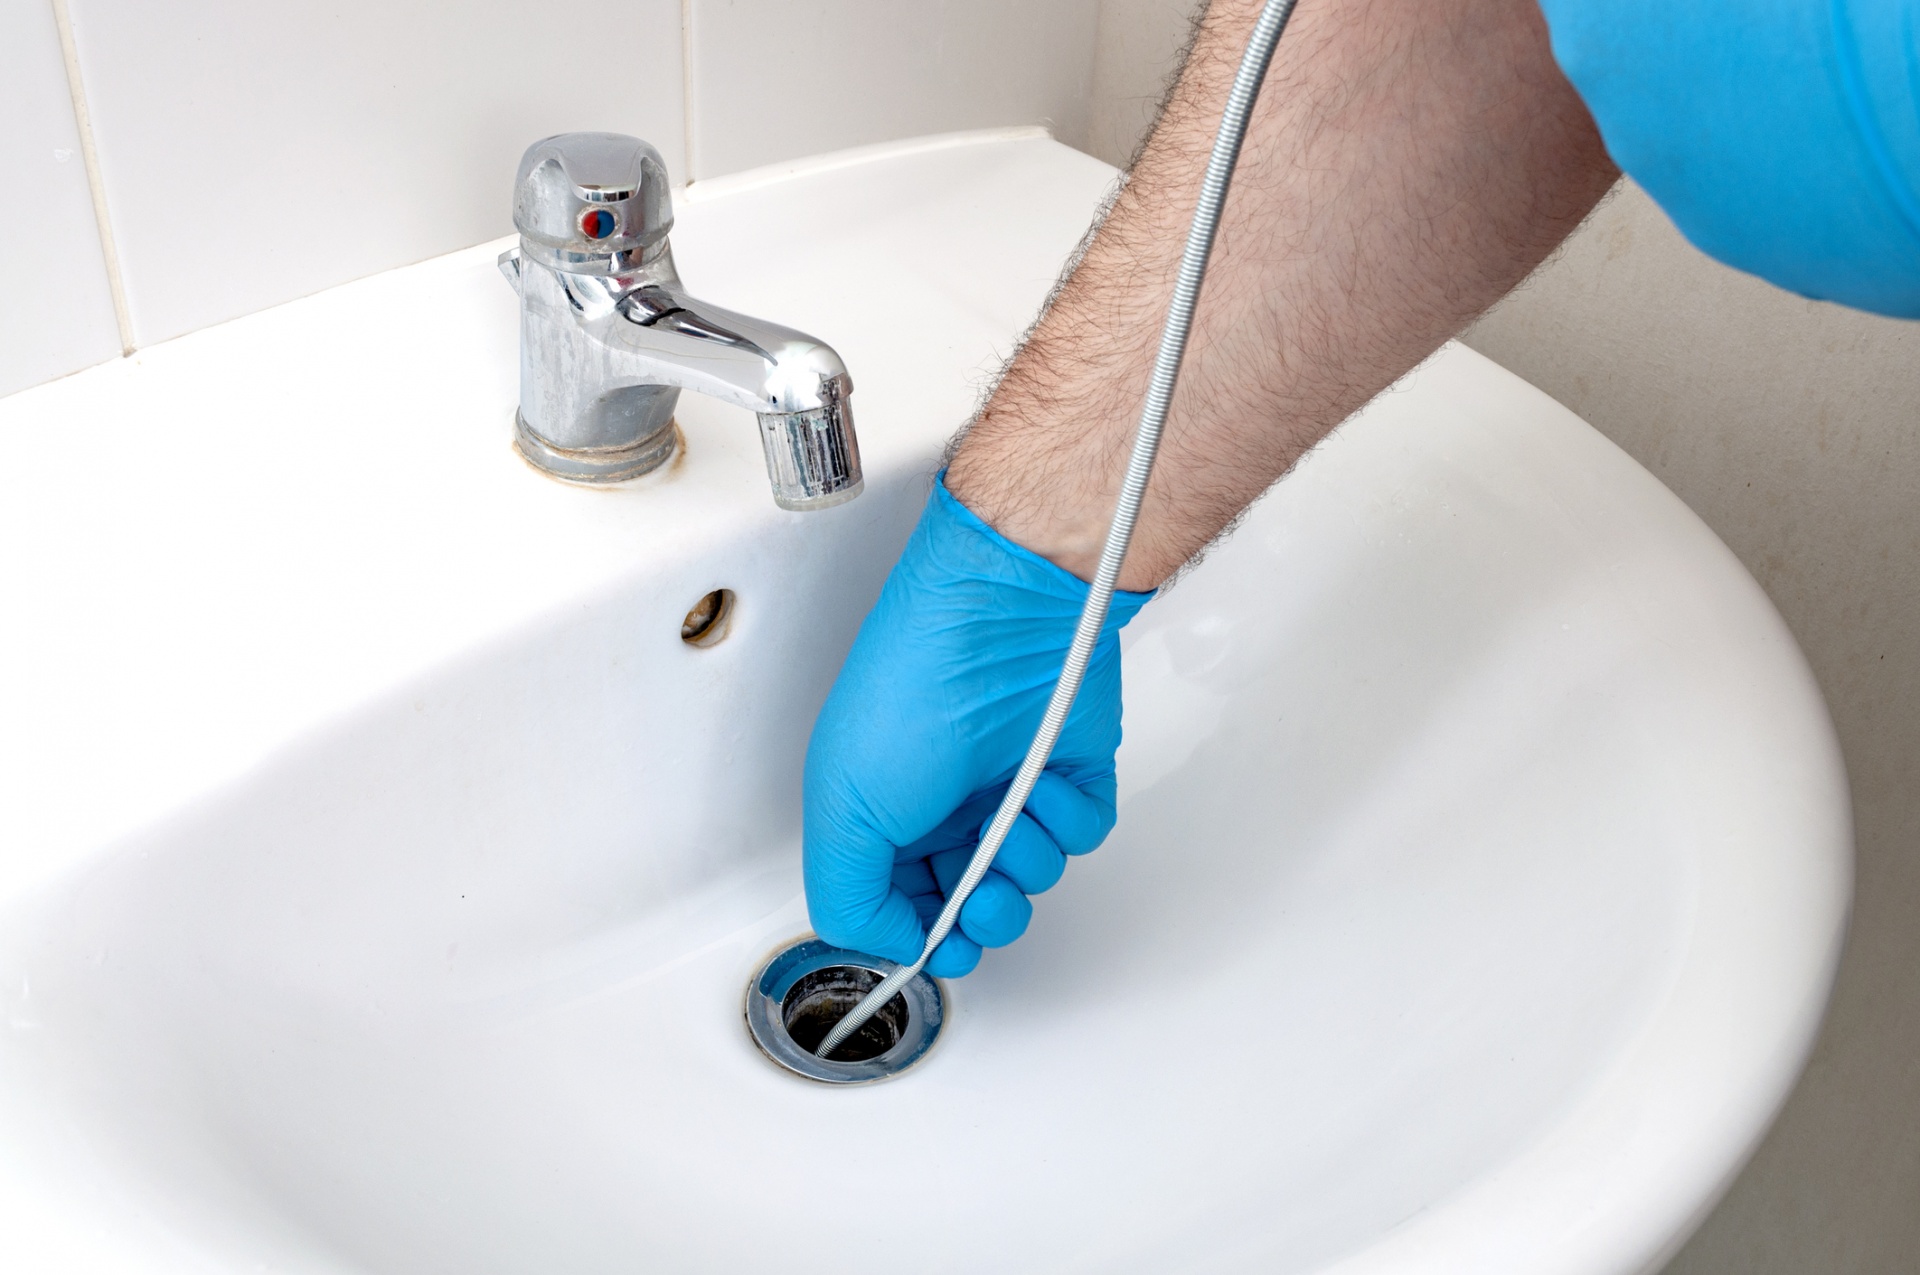
If you have plumbing problems that are deep in your system or hard to identify, a video pipe inspection may be just what you need. It’s a great way to take the guesswork out of plumbing repairs, especially when it comes to problems that are out of sight.
If you think that you have a plumbing problem that would benefit from a video pipe inspection in Barrington, IL, give our team a call. You can keep reading to learn more about when we use video pipe inspections and how they help us with plumbing repairs. We are here to help with all of your plumbing needs and want to get the job done as efficiently and effectively as possible.
Your home has sewer pipes whether they connect to a septic tank in your yard for your local sewage system. You may not give these lines much thought, but it is very important to have them cleaned once in a while. If you don’t, you may be spending a lot of time and money on repairs in the future.
And that doesn’t even include the headache of cleanup that comes along with sewer pipes filled with gunk and grime. If you want to schedule a sewer cleaning in Algonquin, IL, our team is here to help. You can keep reading to learn more about why this service is so important for your home’s plumbing and your family’s well-being.
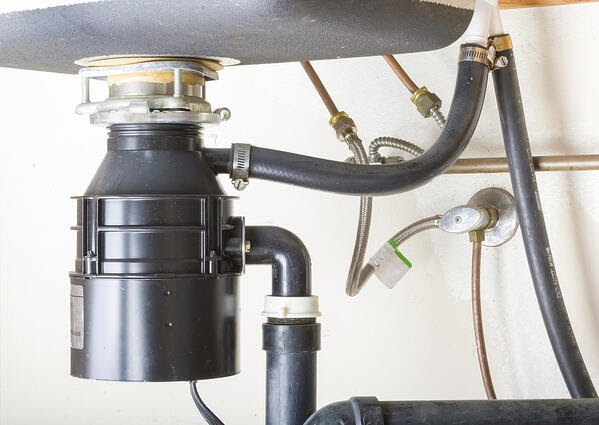
A broken garbage disposal can be a major headache. It can completely disrupt your usual dishes routine and lead to clogs in your drain. Luckily, if you’re having issues with your garbage disposal, there are ways you can fix it.
Potential Issues With Your Garbage Disposal and How to Fix Them
There are several problems you could be having with your garbage disposal. Here are a few of the most common problems that occur with garbage disposals and what you can do to fix them.
Garbage Disposal Won’t Turn On
One of the most common problems that homeowners face with their garbage disposal is that it won’t turn on when they flip the switch. The good news is that this is often a simple repair process.
If your garbage disposal won’t turn on, there could a problem with your power supply. If you think this is the case, locate the reset button on the bottom of the disposal and press it.
If that doesn’t work, check your circuit breaker to see if the switch that supplies power to the unit has been switched off. If neither of these options works, then you may need to get your plumbing repaired by a professional.
Humming Noise or Slow Drainage
If your garbage disposal is humming but is not grinding any food waste, or your sink is becoming flooded with water and debris, there may be a jam within your garbage disposal.
Due to the amount of food, waste, and debris that gets shoved into a garbage disposal, this problem is also fairly common. Luckily, this is another traditionally easy repair that often involves removing an object that has been wedged into the disposal.
First, turn the disposal all the way off so that you can safely inspect the blades. Yes, this means turning off the power to your disposal. You don’t want to risk losing any fingers!
Then, take a flashlight and take a look around the interior of the garbage disposal. Once you have identified the foreign object causing the jam, use a pair of pliers to remove the item.
Afterward, run water down the disposal to remove any excess debris that might still be caught. Then, run the garbage disposal.
Garbage Disposal Leaks
Over time, the vibration from the garbage disposal can loosen its connection, causing water to leak from your sink drain and into the base of the cabinet below. In most instances, the cause of the leak is due to the flange that attaches the disposal to the bottom of the unit.
To fix the leak, turn off the power to the garbage disposal and remove it from its mounting flange. Next, loosen the bolts and push the flange above the sink surface. Apply a new plumber bead between the flange and the sink.
Afterward, reattach the flange, bolts, and disposal and reconnect the power to ensure your disposal is working correctly. If the leak continues, you may need to call a plumber to have the garbage disposal replaced.
Contact Althoff Industries for Emergency Plumbing Services
Although the garbage disposal may seem like an uncomplicated piece of machinery, it often causes problems for homeowners. If you have tried everything mentioned above and are still having issues, it may be time to call a professional.
Severe plumbing problems shouldn’t wait, which is why it’s critical that you have an emergency plumbing service on call, no matter what time of day it is.
At Althoff Industries, we provide our Chicago, Illinois customers with around-the-clock emergency plumbing repair services. We make sure that you never have to worry about the plumbing in your home.
Whether you need routine maintenance, emergency repairs, or new plumbing installed in your home, we provide licensed and specialized plumbing services to our neighbors in Northwest Chicago.
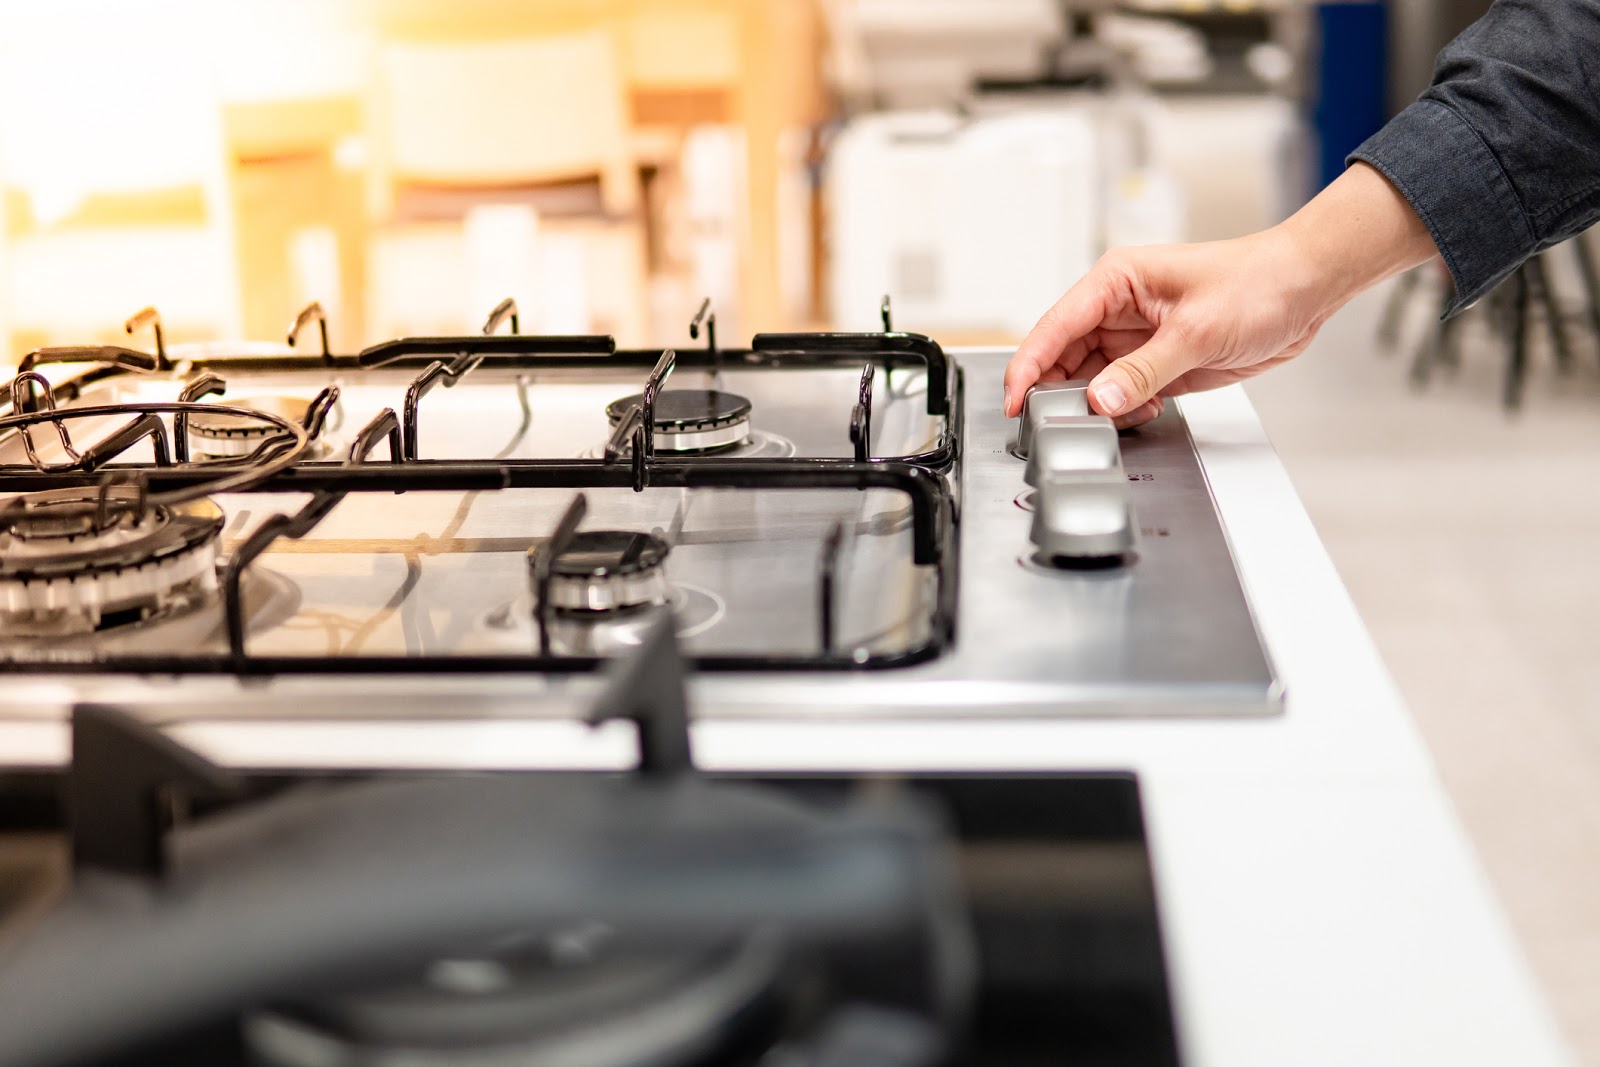
Natural gas is a relatively safe, effective, and convenient source of energy. However, if the natural gas line in your property is not correctly installed or maintained, a natural gas leak can become a health risk and a source of danger in your home. Additionally, gas leaks also have explosive potential thanks to the extremely flammable nature of the gas vapors.
Male hand turning switch knob on modern gas stove in kitchen showroom. Cooking appliance in domestic kitchen. Home improvement and House interior design concepts
Signs You Might Have a Gas Leak
Natural gas is used in households for different heating needs. When properly installed and maintained, natural gas is a reliable and stable utility. However, regular wear and tear or improper use of gas appliances can lead to a gas leak.
Gas leakage can occur in several locations. Some leaks are easy to find, but not all of them are as immediately apparent. Whether at home or a place of business, it is necessary to know the signs, symptoms and procedures associated with gas leakage. Here are some of the most common warning signs of a gas leak.
Rotten Egg Smell
The most common sign of a natural gas leak is the scent of rotten eggs. For safety reasons, a substance called mercaptan is added to natural gas lines by utility companies. Mercaptan is harmless, but it has an odor that compares to that of rotten eggs. If you smell the scent of rotten eggs in your home, then you might have a natural gas leak.
Bubbling in Standing Water
One of the quickest ways to determine whether or not you have a gas leak is to conduct a bubble test. If you see bubbles formed in any wet areas around your home, you may have an underground gas leak.
Hissing Sound
A hissing sound that escapes from nearby gas lines is one of the first indications of a significant gas leak. If you hear the sound of air leaking out of a nearby pipe, you should call a gas company or another professional and leave the area immediately.
Dead Plants
If there is a leak in the gas line of your home, dead or dying plants can warn you of the problem. When a natural gas leak occurs, it displaces the oxygen required for the plants to survive. If you find dead plants in your home or yard, you might have a natural gas leak.
Why It’s Important to Fix a Gas Leak
A skilled plumber can easily find the source of a natural gas leak and fix it safely. However, uncontrolled gas leaks can pose a risk to nearby individuals. In addition to physical conditions, natural gas is flammable, so it is advised that you stop using electrical appliances or lights immediately.
While natural gas is non-toxic, prolonged exposure to its products can cause a noticeable decline in health. As natural gas keeps leaking into your home, it can impair your sense of smell and cause breathing problems, headaches and nausea.
What to Do if You Find a Gas Leak
If you think you suspect a gas leak has occurred in your home, make sure to open all your windows, turn off the pilot light or water heater, and leave the house as quickly as possible. Next, once signs of a natural gas leak have been found and you are safely away from your home, you will want to call your local gas company or contact local emergency plumbing services.
Wait until you and your loved ones have completely evacuated your home before making any emergency calls. Electronic devices produce static electricity that can potentially ignite the extremely flammable natural gas that has leaked into the air.
Contact Althoff Industries to Fix Your Gas Leak!
If you smell gas or have another reason to suspect that you may have a gas leak in your home, make sure that you call Althoff Industries. Our team of highly-experienced professionals want to make sure that your home is a safe and comfortable place for you and your loved ones to live.
We offer expert, licensed plumbing services in the northwest Chicago area and can assist with any gas leak issues your home may have. In addition, we offer 24-hour emergency services and can be reached at our emergency hotline (815) 455-7000.
When it comes to any sort of problem in the home, you want to make sure that you pick up on it at the earliest opportunity. After all, the sooner you notice an issue, the quicker it can be fixed. This can make it a lot more convenient and cost-effective too.
However, the trouble is that we often do not realize that we have a big problem until it is too late. Because of this, we are going to take a look at some of the most common plumbing issues that may seem small but can cause a big headache.
Bubbling Wall Paint or Ceiling Paint
The first indicator that you have a plumbing issue is bubbling wall or ceiling paint. If this is an issue that you have noticed, it is an indicator that you have an excess amount of moisture. The most common cause of this plumbing problem is a leak in the plumbing system or the roof.
If you notice that you have any blistering or bubbling in your paint, or there are brown spots appearing on your wall or ceiling, it can be easy to simply ignore these. However, you should not do that. Now is the time for you to explore the problem further to make sure that you do not end up with a plumbing nightmare on your hands. A reputable plumber like Althoff Industries will be able to investigate the issue for you to ensure it is rectified quickly.
Spiking Water Bills
Have you noticed that your water bills are a lot higher than usual? If this is the case, it could be that there is some sort of problem. After all, if your water use has not increased significantly, then there must be another issue. High water bills indicate that something has changed within your plumbing system.
A running toilet is one of the most common reasons why people have spikes in their water system. A lot of homeowners do not appreciate the quantity of water used by their toilets. A toilet valve is pretty much a garden hose going at full blast. Therefore, it is not unusual for hundreds of dollars to be wasted as a consequence of a single running toilet.
Other common issues that could cause a spike in your water bill include clogged drains, dripping faucets, or a problem with your water supply. If you notice any of these issues, then make sure to call a plumber straight away.
Weak Water Flow In a Number of Locations
Low water pressure or a slow stream of water indicates that there is a problem with your water supply. If this is something that is only happening in one place in your home, the problem will typically be in the faucet aerator. Luckily, this is a pretty easy fix. However, if you have low water pressure in numerous spots around your property, this is an indication of a bigger issue.
If this is the case, the issue is probably going to be at the water main. It could also be an active leak in the supply line, which is the worst-case scenario, or a problem with the hot water heater. If you see that you have low water pressure and a number of other symptoms have presented themselves too, you really do need to call a professional plumber at the earliest opportunity.
Sewer Odor
A general rule in the world of plumbing is that all drains require a trap and all traps need to have a vent. All of these drains and traps have been designed so that sewer gas does not get inside of your home. The vents within your property should ensure that sewer odor is channeled up to the roof, while a ‘water plug’ is created by the drain traps and this acts as a barrier, preventing sewer odors from coming through your sink drain.
So, if you can smell sewer gas in your property, this means that either the vent line has cracked or the trap has run dry. You can fix a dry trap very easily. All you need to do is refill it with water. It is worth doing a quick assessment to make sure that there are not any signs of a leak. It can be much more difficult to track down a cracked sewer vent, though.
This is because they are enclosed into the wall, which demands a bit of drywall surgery. Your plumber will be able to provide you with more information on this if required.
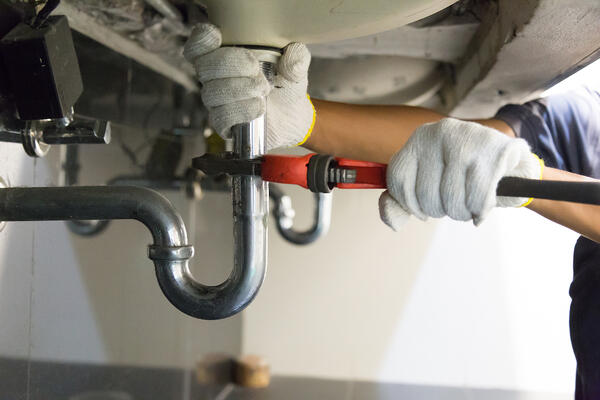
Discolored Pipes
On a final note, discolored pipes can be an indicator of a bigger problem. Yes, they are unsightly, but a lot of people simply put up with this, especially as most pipes are located out of eyesight. So, if there are any signs of discoloration on your pipes, whether under your kitchen sink or in your basement, it is worth exploring this further because it indicates that moisture is present.
This may have happened as a consequence of dripping from a drain line or sink. In some cases, it can be a more severe incident, for example, a slow leak within the supply line. If it turns out that it is the latter, this is something that needs to be dealt with sooner rather than later.
To conclude, there are a lot of different plumbing issues that can seem small on the surface but can result in big problems if you are not careful. If you notice any of the signs that have been discussed above, the best thing to do is get in touch with a professional plumber like Althoff Industries as soon as you can.
Whether it is a small issue like a malfunctioning garbage disposal or a slow drain, or a larger problem with your water supply, we will be able to assess the issue for you and ensure that it is rectified quickly and effectively so that you can have complete peace of mind.
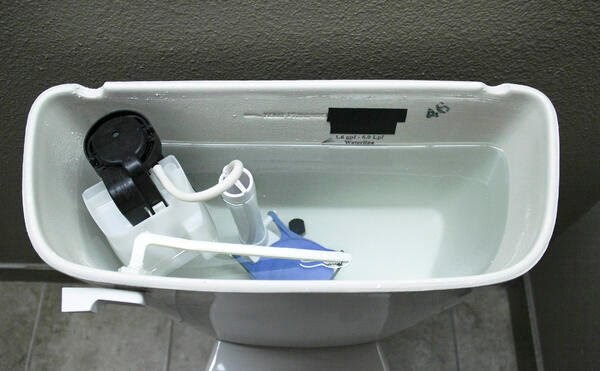
Toilets are notoriously prone to plumbing issues. As necessary as they are, toilets can suffer from a number of problems, one of the most common being the toilet tank overfilling.
Toilets are made up of two major components: the toilet bowl and the toilet tank. The latter of which is usually the cause of any plumbing problems that your toilet may be having.
When the toilet tank overfills it can lead to lots of other problems, chief among them being flooding. Nobody wants to come home from work to find their bathroom flooded. A flooded bathroom could lead to you having to pay significant money for floor and wall repairs.
Along with an outright blockage in the waste line, an overflowing toilet tank is one of the more serious problems that your toilet could be having because it can waste water.
There are a number of common causes that can lead to this issue, but there are plenty of solutions as well. Some of these you can take care of by yourself, whereas others you will probably want to call a professional to come fix them for you.
This guide will help you diagnose the problem and figure out some possible solutions if you notice that your toilet tank is overfilling.
Most Common Causes for Your Toilet Tank Overfilling or Overflowing
There are two very common issues that could lead to your toilet tank overfilling. Because your problem likely stems from one of these two issues, it is fairly easy to diagnose what is causing the excessive water in your toilet tank.
A Misaligned Overflow Tube
When you flush the toilet, the rubber flapper which normally covers the flush valve is released. When this happens, the water that was previously resting in the toilet tank is forced into the toilet bowl at a high speed.
This is what causes the waste in your toilet bowl to be flushed into the sewer. After this process is complete, the toilet’s fill valve, which connects to your house’s water supply, fills the toilet tank back up with water, readying it for another flush.
If you remove the lid and look into your toilet tank, you will notice a white tube floating in the middle of the tank. This is the overflow tube. This is what prevents your tank from, well, overflowing.
The tube normally works by sending excess water in the toilet tank back into the bowl to stop it from either spilling over the sides or leaking through the opening where the flushing lever is located.
If the tube is out of alignment or is set too high, then it needs to be adjusted to the correct height so that it can properly deal with excess water. This can be done by using a hacksaw to cut the overflow tube and correct its alignment.
This can be done by yourself, but, if you’re worried about cutting the overflow tube incorrectly or damaging other areas of your tank, you may want to consider calling the professionals at Althoff Industries to come out and do the job for you.
A Leaky Fill Valve
It is easy to recognize if your overflow tube is not functioning properly, because water will be spilling out the sides of the tank. However, if your overflow tube is working the way it should, but your toilet tank is still overfilling, then it will manifest itself as a different issue: a running toilet.
A running toilet describes a toilet that will not stop running despite the fact that it has not been flushed recently. This occurs because the fill valve, which is used to refill the tank, has been worn down over time and is constantly leaking water into the toilet tank.
Since your overflow tube is working, the excess water will not spill out the sides, but your toilet will continuously run due to the cycle of the toilet tank filling and emptying repeating over and over again.
In order to check your fill valve, turn off the water to your toilet by pulling the lever that is located behind the toilet bowl. Then, flush the toilet to drain the water out of the tank. Since the water is turned off, your fill valve will not refill the tank.
After you have taken care of these steps, take a look at the sealing around the edges of the fill valve. If you notice any cracks or chips in the seal, then you have discovered your problem. The fill valve needs to be replaced, otherwise, your toilet will never stop filling.
If this is coupled with a broken overflow tube, then it could cause a flood. A fill valve should only be replaced by a professional plumber. They will be able to replace the valve without causing any more damage.
Other Causes For a Running Toilet
A Faulty Flapper
A constantly running toilet can be related to other factors besides the fill valve. While these issues don’t necessarily lead to overfilling per se, they can be the cause of a running toilet if you find that your fill valve is working just fine.
As we mentioned before, the rubber flapper covers the flush valve, which does the exact opposite of the fill valve. The flush valve pushes the water from the tank into the bowl to flush the waste away into the sewer.
However, if the rubber flapper is failing to work properly, water will continuously seep into the bowl causing it to run constantly.
If this is in fact your problem, then you should replace the rubber flapper in your toilet tank. It has probably become compromised due to wear and tear over the years. A new flapper should do the trick.
A Broken Ball Float
This issue is similar to the previous one. Older toilets used a ball float to control the flushing mechanism until the much more effective rubber flapper was introduced. Rubber flappers have replaced ball floats in newer models of toilets.
If you live in an old house with an older model of toilet, it is likely that you have a ball float and not a rubber flapper. If this is the case, and your toilet is constantly running, you will either have to purchase a new ball float or rubber flapper.
However, we recommend that you just go ahead and replace the ball float with a rubber flapper, as flappers are the newer technology and are far less likely to break again.
Althoff Industries has years of experience solving people’s plumbing woes in the Chicago area. If your toilet has been afflicted by any one of these issues or is experiencing other problems, have us come out and take care of it today!
Plumbing issues can be a big problem, especially when they affect something you use every day like your toilet. If you are having toilet flush problems, it is important to determine the source of the problem. This article will help you to identify the problem, figure out how to solve it and get that toilet flushing once again.
A lot of issues are minor and can easily be rectified. However, some pretty severe plumbing concerns may require a visit from the professionals. We’ll run through the most common issues and provide some tips on what to do.
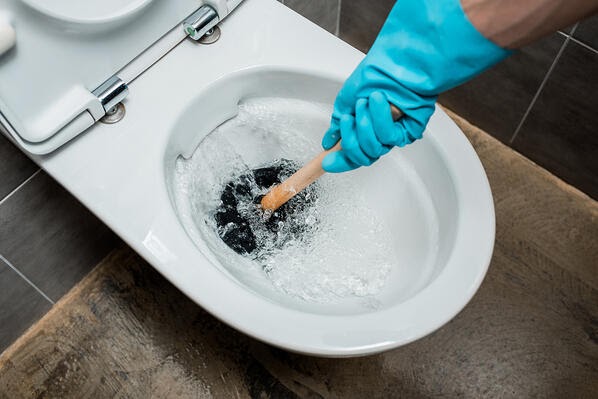
Clogged Toilet
The number one cause of toilet problems is a clog. This usually stems from attempting to flush too much toilet paper at once or trying to flush objects that weren’t meant to be flushed in the first place.
Either way, this problem is solved by using your toilet plunger to dislodge the blockage. This should solve the problem and allow you to fish out the culprits to avoid another clog.
However, if this does not work, then your clog is more serious. Most clogs happen in the toilet itself, which is why your plunger works. But, if the clog is deeper into the pipes, you may be unable to remove it. The best advice is to call the professionals at Althoff to help you out. They can find the source of the blockage and remove it for you.
Flapper Issues
The flapper is the rubber seal found inside the upper tank that helps to release water when you flush the toilet. It also prevents the tank from overflowing when it fills back up. There are two possible problems that could arise with the flapper inside your toilet tank.
The first is when the flapper becomes misshapen and no longer works properly. This is easily remedied by purchasing a new one for your toilet. Just make sure to drain the water tank before replacing the flapper.
The other issue relates to the chain that attaches to the flapper. This also connects to the flushing handle, and it needs to be tight enough to trigger the flushing mechanism. Over time, the chain can get too loose, making it unable to lift the flapper and initiate a flush.
If you keep pushing the handle and nothing happens, this is most likely your problem. To correct this, simply tighten the chain, which will enable it to pull the flapper up.
A Lack of Water
It is possible that you may have accidentally turned off the water valve in your toilet. This decreases the water levels in the tank, which means your toilet won’t be able to flush. If the valve is off, you need to switch it back on to get your toilet working properly. If it turns out that the valve is not turned off, there could be a more serious problem, so call a plumber to diagnose the issue.
Clogged Inlet Holes
If you look under the lip of your toilet bowl, you will notice several small holes. These are called the inlet holes, and they’re responsible for flushing the water from the tank into the toilet bowl.
It’s extremely common for these holes to become blocked or clogged due to a build-up of bacteria and/or mineral deposits. If you think your inlet holes may be clogged, simply try flushing your toilet and watch carefully to see if some of the holes do not have water coming from them.
A clogged inlet hole stops water being sent from the tank from reaching the toilet bowl. This reduces your toilet’s flushing power. Thankfully, this problem can be solved easily enough by cleaning the inlet holes. You can do it yourself by using a mirror to get a good angle and then using a thin tool to unclog the holes, or you can call the professionals to take care of it for you.
Terrible Toilet Design
Has your toilet always had flushing problems? Perhaps it’s always been slow, but it’s gotten even slower lately? If this is the case, you could have issues with its design. If a toilet drain pipe isn’t designed correctly, it won’t flush properly.
You’ll know if this is your issue because you’ve tried to fix all the other potential problems and you’re still having issues. The only way to solve this is by calling a plumbing professional to redesign your toilet drain pipe to make it flush more efficiently.
These are the most frequent causes of flushing problems in toilets. Check your toilet to see which one is your culprit, then work on getting it fixed. If you’re ever in doubt, call a professional plumbing company to take care of everything for you.
If you are having plumbing issues, give the experts at Althoff a call at (815) 455-7000 and let us come help solve the issue quickly!
There’s nothing worse than coming home after a long day at work to a house full of water. 30+ gallons of water sure seems like a lot when it’s accumulating throughout your home.
Despite advancements in engineering and product manufacturing, most tank water heaters have a 10 to 15-year lifespan. The good news is, the earlier you catch a water heater leak, the better. Plus, not all water leaks indicate you’ll need to replace the entire unit.
If your water heater is just starting to leak, act quickly before you need an expensive repair, or you have a flash flood on your hands.
Safety First!
Remember, when dealing with a leak, your water heater gets hot enough to cause first degree burns. There is also electricity going to your water heater, which can cause a severe electrical shock.
So, before inspecting and working on your water heater, be sure to turn off the power at the circuit breaker and turn off the water supply.
Check to See What’s Causing the Leak
With a tank water heater, there’s water coming in, water heated in the tank, and water flowing out.
Water is constantly flowing through the appliance, so there are several places to inspect to see where the leak is coming from.
Loose connections
Check to make sure the connections to and from the tank are tight and that the lines don’t show any signs of damage or excessive wear.
You can tighten these connections yourself pretty easily. If you are nervous, you can always contact a professional to come and assist you.
Leaky elbow joints
While inspecting the connections, check any joints in the piping. These areas can experience extra stress as water flows to and from the tank.
These likely need to be replaced or tightened.
Temperature and pressure valve
As the water heater heats the water in the tank, it creates gas and pressure. The temperature and pressure valve safely ensures that your water heater tank doesn’t explode. There should be a vertical pipe that runs down the side of your tank that stops just a few inches above the floor.
Usually, if the temperature and pressure valve is leaking, there will be a puddle below this pipe or water stains on the floor.
This is a slightly more advanced repair and best performed by a professional who is familiar with water heaters.
Water heater tank drain valve
Every tank water heater has a drain valve located near the bottom of the tank. Over time, sediment at the bottom of the tank can wear down the seal on the drain valve and cause a leak.
If this part is to blame, you should be able to see water or water staining around or below the valve.
The drain valve will need to be replaced if this is the source of the leak.
Leaky gaskets
If you have an electric water heater, it contains gaskets to protect the electric heating elements from contacting water. Electric water heaters will have a hatch that allows you to inspect the electrical connections and check for signs of moisture.
If you see signs of moisture here, contact a professional as this can be a dangerous repair to attempt without experience.
Failing water heater tank
When water flows through the tank, it carries a small amount of minerals and sediment in the water supply.
As the tank heats the water, this sediment settles and builds up at the bottom of the tank. Eventually, this sediment will erode through the tank’s lining from the inside. If you notice water pooling below the tank and a significant amount of rust, it’s time to replace your water heater.
How to Prevent Water Heater Leaks
Water heater leaks are an eventual pain almost all homeowners will experience at one point or another. If you’ve experienced any kind of leak before, you’ll know that water damage is messy and expensive. However, there are preventative maintenance tips you can follow that will help prolong the life of your water heater and help you catch a small leak before it boils over into a flood.
Drain your water heater annually
Sediment can gradually cause serious damage to your water heater over time. One way to lessen this damage is by draining and flushing your water heater tank annually. This procedure can also help your water heater function more efficiently.
Inspect your water heater regularly
It’s easy to forget about your water heater until you experience a warning sign like no hot water when you shower, or you step on a sopping wet carpet. Water heaters are usually tucked away in your basement or in a utility closet so it can be hard to remember to inspect them. Make a habit of inspecting your water heater periodically to check for excess moisture and leaks.
You can always set up a prescheduled maintenance plan with the Althoff team to ensure that your water heater is good to go and leak-free all year long.
Need Help With a Water Heater Leak or Maintenance?
Althoff Industries has plumbers available to help with all your water heater needs 24/7, 365 days a year. If you’re in the Chicago area, give us a call at 815-455-7000 and schedule an appointment today.
We’re always looking for new ways to save money without giving up the small luxuries we love. By switching to energy-efficient appliances, you could save hundreds of dollars per year.
Better yet, you’ll be keeping more money in your pocket, instead of paying it to the utility companies. That means more vacations and less painful bills and this switch will have minimal impact on your life.
Not only are energy-efficient appliances good for your wallet, they’re also beneficial for the environment as well. You’ll sleep easier knowing you’re making smart environmental and financial decisions.
Energy Star Appliances and SEER Ratings
If you’ve purchased an appliance in the past 25 years, you’re probably familiar with the Energy Star label. Energy Star is a U.S. Environmental Protection Agency voluntary program that helps businesses and individuals save money and protect our climate through superior energy efficiency.
According to the Energy Star website, “Since 1992, Energy Star and its partners helped save American families and businesses nearly 4 trillion kilowatt-hours of electricity and achieve over 3 billion metric tons of greenhouse gas reductions, equivalent to the annual emissions of over 600 million cars. In 2017 alone, Energy Star and its partners helped Americans avoid $30 billion in energy costs.”
SEER stands for “Seasonal Energy Efficiency Ratio,” and is the efficiency rating of an HVAC system, which measures the efficiency of specific appliances in your home. The SEER rating of an appliance—your AC unit, refrigerator, or your heating system—is based on a number of factors.
It is also important to note that the higher the SEER rating, the more energy-efficient the appliance will be.
Energy-Efficient Appliances Use Less Energy and Save You Money
Customers often wonder how they can save money by dropping money on new energy-efficient appliances when their older models seem to be functioning just fine.
Energy-efficient appliances can help you save money by using less energy and resources such as electricity, gas, and water.
Remember that your gas, water, and electricity bills aren’t set in stone. Utility companies charge based on the amount you consume every month.
Energy-efficient appliances use fewer resources than older appliances to complete the same task, which lowers your monthly utility costs.
Dryers
Dryers generally consume the most energy of any appliance. According to the Natural Resources Defense Council (NRDC), a typical household dryer consumes as much energy per year as an energy-efficient refrigerator, washing machine, and dishwasher combined. If you have an older model, that number could be even higher.
Energy Star certified dryers use 20% less electricity than a conventional model, which will save you a significant amount of money on your energy bills over time.
Washing Machines
Pair that energy-efficient dryer with an energy-efficient washing machine, you’ll enjoy even bigger savings on your monthly bills.
An Energy Star certified washing machine uses about 25% less energy and 33% less water than regular washers, according to Energy Star.
Energy Star also estimated that there are 74 million top-loading washers and 24 million front-loading washers—26 million of which are at least 10 years old—still in use across the country and these inefficient washers cost consumers about $4.7 billion each year in energy and water.
Energy-efficient front-loading clothes washers also require less laundry detergent than top-loading washers, so you save more money from week to week!
Refrigerators
There have been significant advances in the technology used in refrigerators over the last decade or so, which means that outdated refrigerators are using a ton of extra energy in many homes to this day.
The Energy Star certified refrigerators available today are around 10% more energy-efficient than models that meet the federal minimum energy standards.
If you have an older refrigerator, you can save even more on your energy bills by upgrading to a more efficient option. Energy Star certified refrigerators use up to 40% less energy than the conventional models sold in 2001.
Energy-Efficient HVAC Systems
By upgrading the HVAC system in your home, you will likely see a significant return on your investment over time.
Now, it may seem like a lot of cash upfront, but if you keep your new system well-maintained you will definitely see the savings in the long term.
According to the DOE, the most efficient central AC systems today use 30% to 50% less energy than those built in the mid-1970s. Even when a 10-year-old unit is replaced, the new air conditioner can cut cooling costs by anywhere from 20% to 40%.
In addition to that, heating your home actually costs you the most money, making up about 42% of your utility bill according to energy.gov. An outdated system with a low SEER rating is likely costing you a lot more monthly than you would like.
We have come really far when it comes to the technology available in modern HVAC systems in the last 20+ years. Talk to an expert and find out which HVAC system is right for your home so you can start saving.
Other examples of energy-efficient appliances available to consumers include:
Cooking appliances
Dishwashers
Toilets
Water heaters
Are You Considering Making Energy-Efficient Improvements to Your Home?
Maybe you are ready to take a step towards a more energy-efficient home and cost savings or you’re already there and your energy-efficient HVAC system needs maintenance. No matter what your case is, the experts at Althoff Industries can help with your energy-efficient appliance needs.
We’ve been serving the Chicago area for over 60 years, so we’ve done our fair share of energy-efficient home improvements. Contact us at 815-455-7000 and schedule your appointment today!
A garbage disposal can make cleaning up after meals a whole lot easier. Instead of constantly unblocking your drain or having to worry about sneaky pieces of food making their way into your pipes, a garbage disposal does the hard work for you—it grinds up food waste, allowing scraps to easily flow through your pipes and out to the sewer.
More waste that goes out to the sewer means less waste that’s stinking up your trash can.
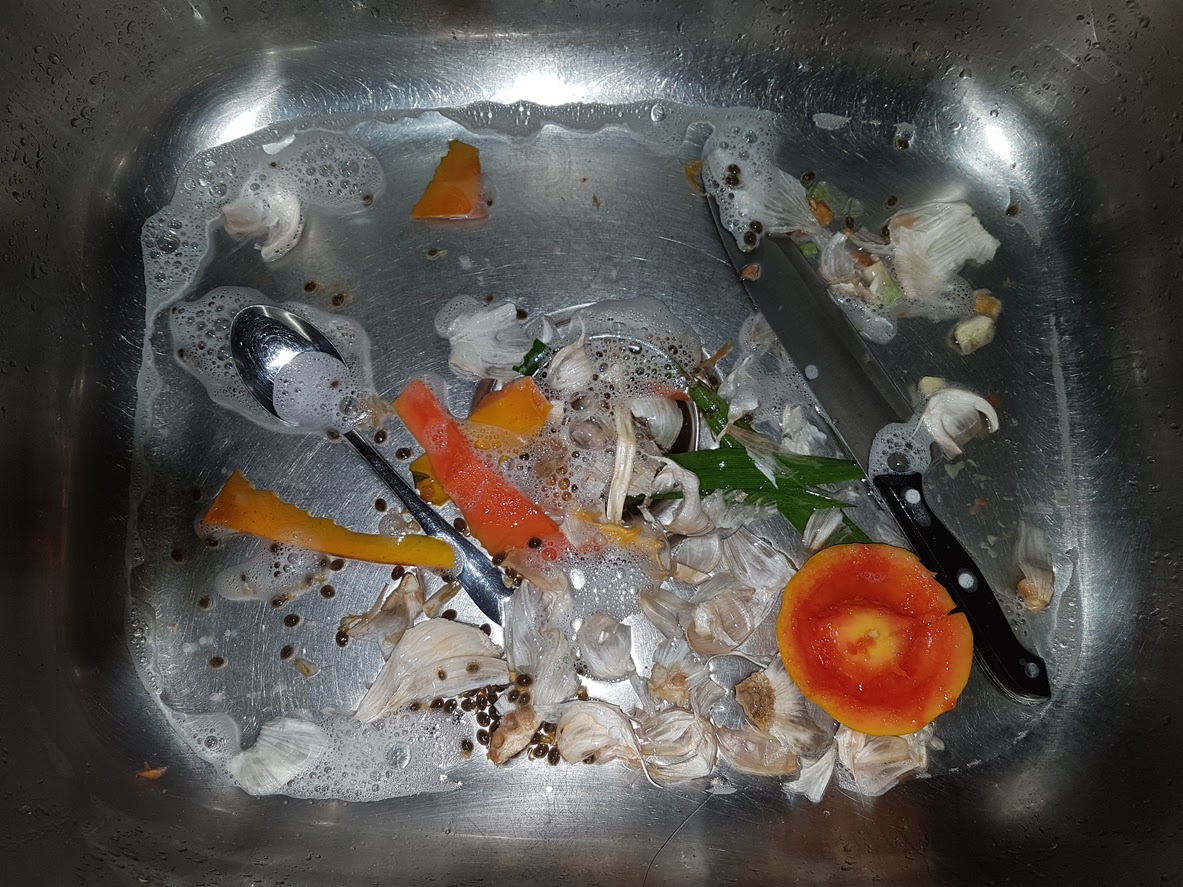
It’s common knowledge not to put things like cooking utensils, plasticware and bottle caps down the garbage disposal, but did you know that there’s a long list of things you should never put down your garbage disposal?
We have a list of food items that can cause havoc on your disposal and plumbing below, but first, let’s talk about how garbage disposals work.
How Does a Garbage Disposal Work?
A big misconception is that garbage disposals work like blenders—that the blades are spinning around, chopping up food into little pieces. However, if you ever take a peek inside of a garbage disposal, you’ll notice that’s not exactly how they work.
Instead, your garbage disposal relies on heavy metal lugs that have been mounted on a spinning plate.
As the lugs spin, the garbage disposal creates centrifugal force, grinding the food particles against a grind ring until they’re essentially liquefied. Once they’ve been ground to bits, water helps flush out the particles and carry the waste down the drain.
Okay, now that you know how a garbage disposal works, here is a list of things you should never put through it.
1. Fats, Oils and Grease
When you’re cooking, heat causes fat, oil and grease to liquify.
Once removed from the heat, these substances begin hardening as they cool.
Unfortunately, your garbage disposal can’t do anything to break down fats, oils and greases when you dump them into the drain.
These substances instead slide through the machine and into your pipes. As they travel down your pipes, they cool and eventually solidify, sticking to the sides of the pipes.
This can cause plumbing problems, including slow-moving drains and blockages.
2. Coffee Grounds
Your garbage disposal won’t have any trouble processing coffee grounds. However, your plumbing might, especially in an older home.
As coffee grounds pass through your drains, they tend to clump together and create clogs and your garbage disposal won’t be able to do anything else to help break down the coffee grounds. They’ll clump together in the pipes no matter how big or small.
3. Bones
Remember, your garbage disposal isn’t a tiny ninja that can pulverize whatever you throw down the drain. Typically, bones are too large and too hard to be broken up by the average garbage disposal.
Most likely, the bones will spin around while making a crazy noise in the garbage disposal forever and never make it down the drain.
It’s best to toss them in the trash when you’re cleaning up after a meal.
4. Fruit Pits
Pieces of leftover fruit shouldn’t be a problem for your garbage disposal, but it’s better to chuck the pits in the garbage.
Generally, fruit pits are too large and too hard to be broken up by the average garbage disposal.
More than likely, the pit will just rattle around inside the disposal and potentially damage the lugs inside preventing them from properly breaking up food particles.
5. Pasta, Rice and Oatmeal
In small quantities, these foods shouldn’t be too much trouble for your garbage disposal. They’ll simply get spun to small particles and flow down the drain.
The problem with these foods occurs when you dump large quantities into the garbage disposal or let them sit in the garbage disposal for an extended time. Pasta, rice and oatmeal absorb water, which can turn into a gummy, sticky mess. The buildup can cause the lugs to seize inside of your garbage disposal and prevent it from spinning.
6. Corn Husks, Potato Peels and Fibrous Vegetables
High angle view of dirty stainless steel kitchen sink with vegetable and fruit peels
Similar to pasta or oatmeal, small pieces of these vegetables should be ok for your garbage disposal to process.
However, in larger quantities, the fibers in peels and vegetables like celery and some squashes can get tangled up in the garbage disposal, preventing it from spinning around.
You’re better off composting these items instead of trying to wash them down the drain—your pipes and the environment will thank you.
Are You Having Garbage Disposal Trouble?
Whether you’re having trouble with your existing garbage disposal or if you’re looking to add one to your kitchen, Althoff Industries can help.
Our experts are here to help with your plumbing maintenance, repair and installation needs. Give us a call at 815-345-2778 to schedule an estimate today.