Althoff Home Services Blog: Posts Tagged ‘Residential Services’

Why Does My A/C Have Ice on It in the Summer?

Thursday, September 5th, 2019

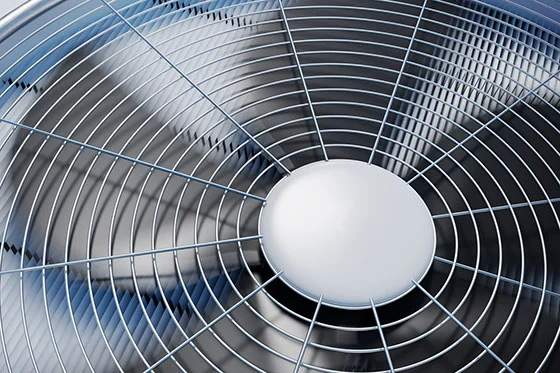
There’s nothing that’ll get you more steamed than coming home to a hot house in the summer. Imagine your surprise when you go to inspect your air conditioner, and it’s covered in ice! Each summer, this is one of the most common calls we get at Althoff Industries.

Luckily, an icy air conditioner is easy to diagnose and repair. While it may seem like you’ll have an expensive repair bill coming your way, oftentimes you simply need to make a few simple changes to prevent your air conditioner from icing over. In this article, we’ll identify the causes of most frozen air conditioners, the repair process and how to prevent your air conditioner from freezing in the future.

Warning: If you notice ice building up on your air conditioner, turn off the unit immediately. To prevent additional damage from occurring, do not turn on the air conditioner until the ice has melted and you have located the cause. If you’re unsure of the issue causing your air conditioner to freeze, contact us to schedule an appointment.

Reduced Air Flow

One of the common culprits we discover when investigating frozen air conditioners is reduced air flow. Usually, this is one of the first issues we look for, since it’s one of the easiest to correct and cheaper for homeowners to repair. Reduced air flow could be caused by any of the following:

  • Dirty air filter. It’s important to inspect and replace your system’s air filter regularly. It’s a relatively inexpensive home ownership task, but you can end up with a hefty repair bill if you don’t keep up with the maintenance. When you have a dirty air filter, your system has to work extra hard to move the air through your home. This causes your air conditioner to work overtime, which may lead to ice buildup on the compressor, among other issues.
  • Too many closed air registers. You might think you’re doing yourself a favor by closing air registers and saving yourself a few dollars on your summer cooling bill. Unfortunately, when you close too many registers, you reduce the amount of airflow below the amount required to optimally run your home’s cooling system, which can cause the condenser to freeze. Make sure at least 75% of your air registers are open at all times.
  • Damaged air ducts. Depending on where they’re located, in a wall, basement or even closet, your system air ducts can take a beating when you’re moving heavy equipment or doing home repairs. If you end up damaging a duct, you can decrease the airflow.
  • Decreased fan speed. Over time, your system can get worn down, and your fan speed can decrease. On the other hand, your system’s fan speed may not have been set fast enough to begin with. If you’ve tried all other air flow repair methods without any luck, a technician can help you determine if the fan speed is freezing your air conditioner.

Faulty Thermostat

If your system is having trouble regulating the temperature, you waste money, energy, and odds are, your air conditioner is freezing over. When your system can’t properly regulate temperature, it’s running constantly, even when it’s cold out at night. As your condenser works overtime, the coils can build up condensation and eventually freeze over. If you notice your system is running even when it’s cool outside, your thermostat could be the culprit. A professional can help you test your thermostat and pinpoint the issue.

Drainage Problems

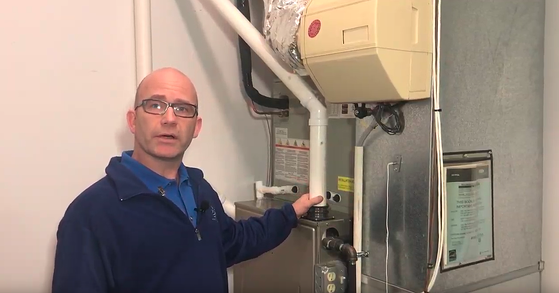
In addition to keeping your house cool, your air conditioner extracts humidity from the air to make your home’s air more comfortable. This excess moisture needs somewhere to go if it’s not in the air. Your air conditioning system should have a drainage pipe attached that carries moisture away from the unit. If this pipe becomes blocked, the water can get stuck in the unit and freeze. Ensure your system drain is clear and removing moisture efficiently.

Similar drainage problems can occur if you have a window unit that’s freezing up. To drain properly, window unit air conditioners must be tilted at a slight angle out of the window to allow water to drain. If your window unit is freezing up, ensure the air conditioner is tilted according to the manufacturer’s installation instructions, and check that no debris are blocking the drainage hole. 

Low Refrigerant

You might have never have guessed, but having low refrigerant can actually make your evaporator coil freeze. Seems weird, right? If you don’t have the proper amount of refrigerant in your A/C system, it has to work harder to cool your home. When your unit is working too hard, icing is likely to occur. Typically, low refrigerant is a sign of a leak in the system. You can usually identify a leak by listening for a hissing or gurgling sound coming from the condenser. If you suspect a leak, it’s time to call a professional to help repair the leak and recharge the system with refrigerant.

Is Your Air Conditioner Putting a Freeze on Your Summer Fun?

The experts at Althoff Industries can help you identify why your air conditioner is freezing and repair the issue. Don’t let a frozen air conditioner prevent you from staying cool during the summer, give us a call at 815-900-5002, and schedule your appointment today!

Continue Reading

My A/C Is Running but Not Blowing Cold Air

Monday, July 1st, 2019

Summer is in full swing and, on really hot days, all you want to do when you get home from a long day is to enjoy some cool air conditioning. Nothing kills this excitement more in the warm summer months than entering your home only to realize that your A/C is not blowing cold air. Unfortunately, an A/C is not fail-proof and they can quit blowing cool air for a variety of reasons. We have listed some of these reasons below so you can have an idea of why your A/C quit working and how you can resolve the issue.

Reasons Why Your A/C is Running but Not Blowing Cold Air

1. Your Thermostat Is Set Incorrectly

Sometimes an A/C doesn’t blow cold air simply because your thermostat settings need to be adjusted. Luckily, this is a pretty easy issue to resolve on your own. Some people think that leaving their A/C running all day is the best way to keep their home cool, but it is actually best to set your fan to AUTO, this will ensure that your air conditioner is running only when it is actually cooling the air. Changing this setting will help save money on energy bills, ensure that you don’t wear out your A/C too quickly, and keep your home cool.

2. Your Air Filter Is Dirty

Having a dirty air filter can inhibit airflow which could definitely be a reason that your A/C isn’t blowing cool air. Take out your air filter and see if there is any debris. If you do notice that the air filter is dirty, swap it out for a new one and get in the habit of changing it out every month.

A great way to ensure that your air filter is clean and your A/C works all summer long, we suggest having professional regularly scheduled maintenance.

3. Your Outside Unit Is Dirty

In the same vein as point number two, having an outside unit that is covered in dirt, dust, and other debris could also be inhibiting cool air from making its way into your home.

Air conditioners work when the inside unit (called an evaporator) absorbs heat from the air and then transfers that heat to the outside unit (called the condenser). The condenser can’t properly dissipate heat if it’s dirty or crowded with debris.

You can resolve this issue by spraying the outside unit with a garden hose on a gentle setting and removing weeds and overgrowth around the unit.

4. Refrigerant Leak

Refrigerant is the liquid that absorbs the heat from the air. When you don’t have enough refrigerant, your A/C can’t absorb enough heat to cool the air. Refrigerant leaks are fairly common and can definitely be the reason why your A/C isn’t blowing cold air.

Signs you have a refrigerant leak include:

  1. Ice buildup on the outside unit and line
  2. Bubbling or hissing noises
  3. Your A/C doesn’t cool the home on hot days but works fine on cool days and at night

If you see these signs, turn off your A/C immediately and call a professional. Refrigerant chemicals are very dangerous and need to be handled by the experts.

5. Air Duct Leaks

Over time, the air ducts that move air conditioning through your home may become loose or their seal may be compromised. This means that air is escaping erratically which makes it hard to keep your home at the temperature you want. You will need to have a professional come out and evaluate your air ducts to ensure that they are not leaking cool air and make repairs as needed.

6. A Bad Compressor

The compressor is one of the most important parts of the A/C system and pushes the refrigerant through the unit. If your compressor isn’t working properly, your A/C cannot work. Compressors need to be evaluated by a professional and replaced if they appear worn out or defective. Unfortunately, compressors are expensive unless you have a warranty. Chances are if your compressor is bad, you’ll probably need to replace an entire outside unit.

7. Dirty Evaporator Coils

An evaporator coil is the part of the A/C system where the refrigerant absorbs heat. Over time, the evaporator coils get dirty and affect the performance of your A/C and make it harder to remove warm air.

Dirty evaporator coils can lead to your A/C overheating and potentially shutting off completely. Evaporator coils should be evaluated and cleaned by a professional to ensure that they are in good condition.

Schedule an Appointment and Stay Cool All Summer Long

If your A/C is not blowing cold air, contact our licensed Chicago HVAC technicians. They can help troubleshoot the problem so you can cool down and relax again. Contact us at 815-455-7000 to schedule.

Continue Reading

5 Air Conditioning Noises and Their Causes

Thursday, June 13th, 2019

Summertime—it’s sunshine, warm breezes, barbecues and the gentle hum of air conditioners keeping houses cool throughout the neighborhood. In a split second, that gentle hum can turn into an unnerving hissing, banging or screeching. While all air conditioners make noise, it’s important to be able to recognize which noises are normal, and which noises require a professional inspection.

1. Hissing

Uh oh! More than likely, you’ve sprung a leak. Usually, a hissing sound indicates that your air conditioner is leaking refrigerant. In some cases, there’s a small opening in one of the refrigerant lines. In others, there may be an internal valve leak.

If the hissing is really loud and accompanied by squealing or screeching from the compressor, you need to turn off your air conditioner immediately. This indicates that there is too much pressure in the compressor, which could lead to a costly repair bill if you don’t act soon.

2. Screeching

One of the most startling noises is generally one of the easiest to diagnose. In newer direct-drive A/C units, you can trace a screeching noise to a shot bearing in the fan motor. Usually, you’ll have to replace the fan motor to get the noise to stop. In older A/C units, the screech could be coming from the belt that connects the motor to the blower. Belts gradually wear down, and you need to replace them from time to time.

3. Banging

A loud banging or rattling can mean that there’s a loose part somewhere in your A/C unit. Before more damage occurs, you’ll want to shut of the air conditioner as soon as you hear the noise. Is the noise louder outside of your house or inside of it? If it’s outside, one of the fan blades could have come loose in the compressor. If the noise is louder inside, your blower fan might be causing the racket.

4. Clicking

Hearing a clicking sound when the air conditioner kicks on is common and completely normal. That click is how your thermostat communicates with the unit. However, when it’s on, your A/C shouldn’t be ticking like a clock.

Like banging noises, clicking often comes from a loose or damaged part that’s hitting against something that it normally wouldn’t. An occasional clicking noise could indicate that there’s something stuck in one of the airways. On the other hand, if the clicking is constantly coming from your thermostat, there could be an issue with the circuit board.

5. Buzzing

A couple of issues could make your air conditioning unit buzz, like a swarm of hornets building a nest in your outside unit. If you can rule out pests, the buzzing could be coming from loose parts rubbing together, or your air conditioner might have frozen up. If you see a buildup of frost and ice on the unit, a professional can help you determine the cause. Finally, listen to hear if the buzzing sound is coming from the unit’s power source. The A/C could be overloading your circuit panel, which will require a professional evaluation.

If your air conditioner is making a noise that it shouldn’t, call Althoff.

Ignoring the problem could cause damage to your unit that then requires more extensive repairs. Have one of our licensed Chicago HVAC technicians check out the sound now and get peace of mind. Contact us at 800-225-2443 to schedule.

Continue Reading

Electrical Emergency Service: Common Code Violations

Friday, May 3rd, 2019

It’s a homeowner’s worst nightmare. You flip on a light switch and nothing happens. You check an outlet, also no power. Finally, you head to the breaker box to see if anything needs to be reset. If that doesn’t work, then you’re calling an electrician and spending the rest of the day in the dark ages until your power is back up and running.

Do you know what’s more frustrating? When the electrician arrives and points out a simple code violation, that if corrected, would’ve saved you the hassle of making a phone call. It’s important, especially if you live in an older home, to be aware of common electrical code violations. Down the road, an inspection can save you from a hefty repair bill or even better, save your home and family from an electrical fire. Here, we’ve illustrated a few common electrical code violations to look for in your home.

electrical fire in outlet

New Lights and Old Wiring Don’t Mix

Back in the day, houses weren’t constructed to handle today’s modern, high wattage light fixtures and bulbs. When you put a high-powered bulb in a fixture that’s only able to handle 60 watts, you’re putting yourself in a dangerous situation. Higher wattage light bulbs create a lot of heat. Over time, that heat can melt the light socket and the insulation around the wires. Without proper insulation and a melted light socket, a fire can spark at any moment. In fact, this is one of the most common causes of electrical fires. It’s also one of the easiest to prevent. Make sure you inspect the light fixture to determine the maximum wattage bulb allowed. When in doubt, always choose a less powerful bulb.

Beware of Knob and Tube Wiring

Anyone who’s familiar with home renovation television shows will spot this electrical issue right away. It’s one of the most common budget-destroying home renovation finds next to asbestos or load bearing beams. Knob and tube was the first type of electrical wiring used in homes built before the 1940’s. We’ve learned a lot since then, and by today’s standards, knob and tube wiring is extremely unsafe. What makes knob and tube wiring so scary is that there’s no ground wire to protect your house from surges and other faults. Instead, the wiring could spark and set your whole house ablaze. If you’re down in your basement and notice old ceramic knob and tube wiring, it’s time to give your house an upgrade before you lose everything you own in a house fire.

Recessed Lighting Deserves a Second Look

Recessed lighting can give rooms a clean, modern look. It can also be a dangerous fire hazard if not installed properly. To be safe, non-IC-rated lights need to be at least three inches away from insulation. If not, the lights can overheat. Non-IC-rated recessed lights can produce a lot of heat, enough heat to ignite insulation that’s too close. If you’re unsure of the type of recessed lighting you have, it’s important that you have a professional to inspect the light and insulation to make sure you’re not at risk of sparking a house fire.

Look Out for Illegal Splicing

This electrical issue might be a bit more difficult for the average homeowner to identify without the help of an expert. Electricians use a splice to connect two or more wires together. In order to be up to code and safe, electricians need to run the wires into a junction box, make a splice with wire nuts and cover the junction box with a cover plate. Oftentimes, DIY homeowners think they can do their own electrical work. Not only is an illegal splice a dangerous fire hazard, but it can be a sign that there are more serious electrical issues in the house. If you suspect an illegal splice in your house, it’s a clear sign you’ll need a more thorough inspection.

Overcrowding Wires Happens Too Often

Sometimes, DIY-ers and inexperienced electricians get lazy. When roughing in electrical wiring, they try to run too many wires through a ⅞ hole. The maximum number of wires allowed through a ⅞ hole is three. When an electrician runs too many wires through a hole, they run the risk of burning. Burning occurs when wires rub together and the insulation wears down. With exposed wiring behind your wall, without you knowing, you run the risk of a fire sparking at any time.

Do You Think You Have An Electrical Emergency?

Have you noticed lights flickering in your home? Outlets not working? Maybe you’ve noticed one of the issues we pointed out on this list. If you think you have an electrical emergency on your hands, give Althoff Industries a call at 815-455-7000 to schedule an appointment today.

This information is provided as a general guideline. Althoff Industries does not assume any liability resulting from the provided information.

Continue Reading

Surge Protector Safety Tips

Monday, March 25th, 2019

Surge protectors are essential electrical safety features in just about every home. Living in a world powered by electronics, most households have at least one surge protector for their computers, entertainment centers, mobile devices or kitchen appliances.

While surge protectors can supercharge productivity, they can also cause devastating damage if used improperly.

Surge Protector Safety: Important Things to Know

According to Electrical Safety Foundation International, “Home electrical fires account for an estimated 51,000 fires each year, nearly 500 deaths, more than 1,400 injuries and $1.3 billion in property damage.” Of those 51,000 fires, “The U.S. Consumer Product Safety Commission (CPSC) reports that electrical receptacles are involved in 5,300 fires every year, causing 40 deaths and more than 100 consumer injuries.”

To make sure your surge protectors are keeping your devices safe, without potentially causing devastating damage to your home, we’ve compiled a list of essential safety tips.

Only Purchase UL or ETL-Certified Surge Protectors

The Underwriters Laboratory (UL) and Intertek ETL certifications help you ensure you’re buying a surge protector that’s been tested and inspected by professional safety organizations. These certifications demonstrate that the surge protector meets electrical safety standards in the U.S. You can identify UL and ETL-certified surge protectors by looking for the logo on the device, checking the owner’s manual or inspecting the device’s packaging. Not only should you see the logo, but you should be able to identify the code for the lab the product was tested in.

Surge Protectors Are Not a Substitute for Additional Wiring

Have you been using a surge protector because there aren’t enough outlets in the room? If so, you may be setting yourself up for an expensive disaster.

A surge protector’s job is to protect the devices plugged into it from an electrical surge, not necessarily give you 10 extra outlets to plug devices into. When you overload a surge protector, you can trip the circuit breaker or blow a fuse. Repeatedly overloading your surge protector can cause greater, more expensive damage to your home’s electrical system or even spark a fire.

To take it a step further, never plug one surge protector into another. This is known as daisy chaining or piggy backing. Interpower quotes a U.S. government white paper on daisy chaining stating, “Most power strips or surge protectors are approved for providing power to a maximum of four or six individual items. When multiple power strips are interconnected, the one directly connected to the building wall outlet is often supplying power to far more outlets than the approved number. This electrical current overload can result in a fire or can cause a circuit breaker to trip, de-energizing computers and other equipment throughout the area that are connected to a surge protector.”

It’s also important to note, never use a 2-to-3-prong adapter to plug in a surge protector. To operate safely, surge protectors must be grounded properly.

Give Your Surge Protector a Check Up

When is the last time you inspected your surge protectors? It’s easy to get caught up in day-to-day life and forget about the surge protector that’s been hiding behind your entertainment center since you bought your television years ago. It’s important to check the surge protector for signs of wear, including worn outlets, frayed wires, chewed wires, or loose wire insulation. You should also hold the surge protector to see if it feels hot. An overheating surge protector is a surefire warning that it’s either overloaded or worn out.

When conducting your inspection, make sure your surge protectors have room to breathe. Blankets, rugs and pillows prevent surge protectors from expelling heat generated by electrical energy. In case of an electrical malfunction, you want to keep flammable materials as far from surge protectors as possible.

Concerned About Your Home’s Electrical Health?

Contact the experts at Althoff Industries. Our knowledgeable technicians can help you tackle any electrical issue, including safety checks, circuit breaker inspections, electrical panel upgrades, wiring upgrades, whole home surge protectors and more. Give us a call today at (815) 455-7000.

This information is provided as a general guideline. Althoff Industries does not assume any liability resulting from the provided information. 

Continue Reading

Can I Get a Tax Credit for Switching to Energy-Efficient Appliances?

Monday, March 18th, 2019

As of the 2018 tax year, many of the federal tax credits for upgrading to new, energy-efficient appliances have expired. In the past, you were able to collect federal tax credits for energy-efficient water heaters, air conditioners, boilers, furnaces and other in-home appliances. Now, the IRS provides these types of tax credits only for residential renewable energy products. According to Energy Star, these tax credits should remain available through December 31, 2021.

The tax credits may have expired, but in many cases it’s still a cost-effective solution to update your major in-home appliances. Depending on the age of your water heater, air conditioner or furnace, you could be wasting valuable dollars every month by powering old, inefficient appliances.

For tax year 2018, we’ll explain some of tax credits you can still qualify for if you decide to choose a renewable energy appliance for your home. We’ll also illustrate some of the cost savings you can expect if you choose to replace your old appliances with energy-efficient ones in 2019.

What appliances can I still get a tax credit for?

The U.S. government has restricted the federal tax credit to apply only to equipment that uses alternative energy. You can receive a 30% tax credit through the end of 2019. After 2019, the credit will gradually decrease until it disappears completely for the 2021 tax year. You can view the appliances available to receive the tax credit on IRS Form 5695. Examples that still qualify for the residential energy credit include:

  • Solar water heater. These water heaters convert power from the sun into an energy-efficient heat source for your water. In order to be eligible, the solar water heater must be installed at your primary residence, not a rental property. At least half of the energy generated by the water heater must come from the sun.
  • Small wind turbine. These residential-sized wind turbines convert wind energy into electricity for your home. In order to qualify, the turbine must be installed at your primary residence; the residence can be a new, existing, or second home. The turbine must have a nameplate capacity of no more than 100 kilowatts.

How do I file my tax rebate?

Filing for your tax rebate is simple, as long as you meet the requirements. According to TurboTax, “To claim the credit, you’ll need IRS Form 5695. Work out the credit amount on that form, then enter it on your 1040. You should keep your receipt for the appliance as well as the Manufacturer’s Certification Statement, so you can prove your claim if the IRS ever conducts an audit.”

Will I save money by upgrading to energy-efficient appliances?

If you’re looking for an appliance upgrade, you don’t need a tax credit to see the cost savings. If any of your appliances have been around for more than 10 years, you can expect to see considerable energy savings when you upgrade to a newer model. For example, according to Energy Star, certified gas storage water heaters are, “about eight percent more efficient than a standard model.” Energy Star certified central air conditioners not only have higher seasonal energy efficiency ratio (SEER) and energy efficiency ratio (EER) ratings but also use about 8 percent less energy than conventional new models.

In total, Energy Star reports that, “By choosing Energy Star, a typical household can save about $575 on their energy bills and still enjoy the quality and performance they expect.”

Are you in the market to upgrade a major home appliance?

Althoff Industries specializes in recommending and replacing furnaces, boilers, air conditioners and more. Contact us today at (815) 455-7000, and we’ll help you get the process started.

Disclaimer: Althoff Industries does not provide tax, legal or accounting services. This article has been prepared for informational purposes only.

Continue Reading

The Most Common Source of Humidifier Leaks (Video)

Tuesday, February 26th, 2019

The number one source of humidifier leaks is the homeowner not changing the water panel inside the unit.

If the panel gets plugged up with hard water deposits, the water can’t travel through the surface space of the panel like it’s supposed to. Instead, it begins to cascade—not down the pad, but on the outside of the unit. You may see water coming out of the cabinet.

Here’s how to maintain your water panel and resolve leaks.

1. Remove the water panel unit from the cabinet and take off the distributor. You will see the nozzle where water goes in and then distributes along a series of holes along the top. If the holes are plugged up with hard water deposits, the water will build up and cascade over the top. Clean any hard water build-up.

2. Change out the water panel itself.

3. Vacuum out the sleeve and/or wash it out in a utility sink or your kitchen sink. Make sure there isn’t any blockage.

4. Before you put the water panel unit back in, take a look at the cabinet. There is a spud along the bottom of the cabinet. A nipple on the bottom of the water panel goes into this spud, creating a connection that allows water to drain out of the bottom of the humidifier. Make sure this is not plugged up with calcium hard water deposits, which can interrupt proper drainage flow.

5. Put the water panel unit back together and place it back in the cabinet.

Test the operation. More than likely you took care of the humidifier leak by changing the water panel, cleaning the distributor, making sure the sleeve is clean, and making sure the cabinet is clear of debris.

Still troubled by a humidifier leak? Hand it off to Althoff.

If the above steps didn’t fix your humidifier leak, or you’d just prefer to have a pro handle the process, call us at (815) 455-7000. Althoff Industries serves the Greater Chicago area.

Continue Reading

How to Prevent Water Heater Leaks

Friday, February 22nd, 2019

Water heater leaks are an inevitable problem for most homeowners, especially with tank water heaters. Like any other appliance, water heaters eventually wear out and need to be replaced. Depending on the brand, use and maintenance, some may last as little as eight years. Other more durable, well-maintained tanks may last 8-12 years.

While there are some factors that are out of your control like water type, manufacturing errors and material quality, there are a steps that you can take to ensure you give your water heater the longest, leak-free life possible.

Prevent water heater leaks before they happen.

As we’ve illustrated, there’s no guaranteed way of preventing your water heater from leaking. As it ages, leaks will become more common as the parts and materials wear down. However, you can take action to make sure you catch minor issues before they turn into major ones:

  • Drain and flush the tank. All water contains minerals. As your tank drains and refills, mineral sediment will start to accumulate, which affects the quality of your hot water and corrodes the bottom of the tank. We recommend draining and flushing sediment from the tank at least once a year.
  • Inspect the anode rod. The anode rod attracts and collects the corrosive mineral sediment that’s present in your water. Eventually, the rod will fill up with sediment, and it won’t be able to remove any more corrosive minerals from your water supply. By inspecting the anode rod and replacing it when it’s completely corroded, you can limit the amount of sediment that settles at the bottom of your water tank.
  • Check pipes and fittings. Make sure the pipes feel sturdy and the fittings are tight. You’d be surprised at how pipes can loosen over time.
  • Identify corrosion and weak spots. Check the tank for any rust, corrosion or other weak spots. This is a warning sign that your water heater is close to failing.

You can make sure these things are done properly and safely by getting a professional water heater tune-up every year.

What causes water heater leaks?

In order to prevent future water heater leaks, you need to understand how leaks occur. Luckily, water heater leaks are pretty easy to spot and diagnose when you can locate the source.

If there’s water everywhere…

Is there water on the walls, ceiling, floor and just about everywhere you look? It might look like your water heater exploded and sprayed water all over the room.

Most likely, it’s not the water heater that’s to blame, but the connection or pipes coming to and from the water heater. Have you ever tried to use a garden hose without screwing on the nozzle all the way? Water sprays everywhere. This is the same concept, just on a larger, messier scale.

Over time, pipe fittings can wear down or loosen. As you continue to use the water heater, the water flowing through will put strain on the pipes, causing the fittings to loosen even further. In some cases, the fittings may have just come loose and need to be tightened. In others, they may need to be replaced completely.

If there’s a huge puddle under the water heater…

Is there a puddle forming at the bottom of your water heater? Is growing worse with every waking minute?water heater leak

This is the most common sign that it’s time to replace your water heater. As your water heater ages, the corrosive properties of the minerals present in your water supply will wear down the lining inside of the tank. You may notice rust or condensation around the base of the water heater tank. That’a surefire way to know that it’s that tank that’s to blame for the mess.

If there’s water gushing from a valve…

Is there water settling more to one side than around the entire base? A loose drain plug might be the culprit. The drain plug is usually located towards the bottom of your water heater tank.

Like the materials that make up the pipes and water heater housing, the drain valve can wear down and fail as the water heater ages.

The pressure release valve can also be the source of a water heater leak. Usually, the pressure release valve is located towards the top of the tank. It looks like a long bent pipe angled towards the floor. There are two telltale signs that the pressure release valve is failing: your water heater is making a high-pitched squealing sound, or there’s water spraying out of the pressure release valve. Depending on the severity of the leak, you may be able to replace the valve, which is relatively inexpensive. In other cases, you may need to replace the whole water heater.

When is the last time you serviced your water heater?

If you can’t remember the last time you serviced your water heater, or if its been over a year, it’s time to give that hard-working appliance some attention.

Althoff Industries has been maintaining and repairing water heaters for over 60 years. With our expertise, you can be sure your water heater is running as efficiently as possible. Give us a call at (815) 455-7000 to schedule your maintenance and inspection today.

Continue Reading

Should I Get a Tank Style or Tankless Water Heater?

Thursday, January 31st, 2019

Tankless water heaters are known for being efficient and small in terms of their overall size and for that reason they are quite popular among most homeowners. Tank-style water heaters, on the other hand, will cost you much less than tankless water heaters and are easier to operate. Both have their benefits and drawbacks, but one might suit your home better than the other.

Tank-style or tankless water heaters: Which is right for your home?

Water heaters are a costly investment, and it’s often a decision you will be living with for more than a decade. However, a water heater can have a significant impact on your life without you even noticing which makes the decision even more important.

Whether you need to make sure you have enough hot water for your household or want to keep a low utility bill, choosing the right water heater for your home is extremely important.

We will now dive in and examine all of the pros and cons of tankless and tank-style water heaters so you can make the most informed decision possible.

Benefits of a Tankless Water Heater

Tankless water heaters are produced to be high-efficiency, direct-vent units. Because tankless water heaters have no tank, instead of slowly heating the water and keeping it in a tank, tankless water heaters only heat the amount of water that is needed and does so rather quickly.

It doesn’t matter if you take a five minute or a forty-five minute shower, you will never run out of hot water, and it will be available to you instantly. Having no tank also allows tankless water heaters to be smaller and rather than taking up a considerable chunk of your floor space, tankless water heaters are able to be mounted on your wall.

The best arguable benefit of a tankless water heater, though, is the amount of energy it consumes or rather doesn’t consume. Because there is no tank of water constantly needing to be kept hot, tankless water heaters don’t experience the same amount of standby energy losses that tank-style water heaters do.

In fact, the most efficient gas tankless water heater on the market has an energy factor of 1 and uses only 150 therms/year for natural gas. Not only that, but tankless water heaters also have a lifespan of 20 years or more which means you will be able to enjoy the upgrade for many years to come.

Drawbacks to a Tankless Water Heater

The most obvious and understandable drawback to a tankless water heater is the overall cost. For both the unit, as well as the installation, tankless water heaters typically cost about twice as much as traditional, tank-style water heaters, depending on the flow rate.

The average cost of a tankless water heater installation varies depending on the type, brand, your home, and whether you are installing a new water heater or replacing an old one.

As we mentioned earlier, tankless water heaters can be mounted on the wall to save floor space, but they also have special venting requirements and often need larger gas lines because of the higher BTU rating which makes them more difficult to install.

Lastly, though tankless water heaters can deliver an unlimited amount of hot water, there is, however, a limit to how much water is delivered at once. Tankless water heaters heat water as it passes through, so it’s important to make sure that you purchase a large enough tankless water heater to ensure that adequate hot water flow is available.

Benefits of a Tank-Style Water Heater

One of the main advantages of tank-style water heaters is that they are more cost-effective than tankless water heaters.

Tank-style water heaters also operate much simpler than tankless water heaters. Because of this simple operation, there will be less maintenance and less repair for almost identical functionality if you opt for a tank-style heater.

Tank-style water heaters can hook up to the existing gas supply in your home without having to make any changes or alterations in plumbing. Tank-style water heaters are also ready to go with the existing electrical power load in your home so new circuits will not have to be put in during installation.

Tank-style water heaters also have no minimum flow rate, so you never have to worry about how much hot water you need at one time. Because tank-style water heaters have a standby supply of heated water, you won’t have to worry about waiting for the water to reach your taps.

Drawbacks to a Tank-Style Water Heater

As with everything, though, there are some drawbacks to having a tank-style water heater in your home. Tank-style water heaters are relatively large and will take up more space in your home. This can be a bit of a challenge because you will need it to be in an area that is convenient and out of sight.

Also, compared to tankless water heaters, you will notice energy loss, also known as “standby loss,” caused by the energy that is wasted on keeping a full tank of hot water at all times.

It’s also worth noting that if the tank-style water heater is in a cool environment, it needs to work even harder during winter months to produce hot water which will increase gas or electric bills.

As you can see, deciding between a tank-style and tankless water heater depends on you and your home’s specific needs.If you are looking for more information on water heaters, or need a water heater installed in your home, contact one of the licensed Chicago plumbers from Althoff. Contact us at 800-225-2443

Continue Reading

How to Extend the Life of Your Furnace

Thursday, December 27th, 2018

Your furnace is a hard-working appliance. Like any other appliance, its parts will wear down over time. However, there are a few steps you can take to make sure your furnace lasts as long as possible.

1. Replace your furnace filter.

When is the last time you checked your furnace filter? Do you remember the last time you replaced it?

A dirty air filter is one of the most common contributors to furnace failure. A filter that is clogged with dirt, dust and dander makes it difficult for your furnace to handle air. This, in turn, causes increased wear-and-tear. Imagine trying to do a strenuous workout with a thick cloth around your mouth and nose, and you’ll get an idea of how hard it is for your furnace to work without enough air. Your furnace can even begin to overheat, increasing the risk of damage.

With regular filter maintenance, you can help your unit breathe easier and extend its life. Filters are relatively inexpensive, and they’re much cheaper than repairing or replacing your broken furnace. To help your furnace run as efficiently as possible, we recommend inspecting your furnace filter one a month and replacing it bi-monthly or as needed.

When installing your new filter, make sure you install it correctly to avoid airflow issues.

2. Check for proper airflow.

You may not be a professional furnace inspector, but there are things you can easily check to help ensure your furnace has the air it needs to operate properly.

  • Intake grills. Make sure there’s nothing blocking the air returns to your furnace, so it can operate properly.
  • Ducts. Visually inspect the ductwork for cracks, holes and gaps. Wave your hand over the joints to see if you feel any air leaking. Cool or cold air coming from the vents is another possible sign of leaking ductwork.
  • Filter Door. Make sure the air filter door is closed properly.
  • Air Vents. Walk around your house to make sure the air vents are open. If too many vents are closed, your furnace may not be able to work efficiently.

3. Get a professional furnace tune-up every fall.

Before you turn on your furnace on for the winter, it’s important to schedule a full furnace tune-up. An annual inspection can keep your furnace clean, identify worn parts, and uncover small issues before they turn into bigger repairs. A thorough furnace tune-up should help prevent the most common winter furnace repairs, like a worn and dirty ignitor and flame sensor problems.

When scheduling your appointment, keep in mind that many HVAC companies will offer an introductory tune-up for a low price. These may seem like a good bargain, but they’re often not in-depth enough to ensure your furnace is performing at its best.

For example, your furnace tune-up should always include a draft check and combustion analysis, which many of these low priced introductory tune-ups do not. The combustion process needs to be checked yearly to ensure safe operation. Gas leaks, high carbon monoxide levels, and improper drafting can be dangerous if not addressed. ALWAYS ask if these elements are included. They’re the only reliable way to assure the efficient and safe operation of your gas furnace.

While a furnace tune-up can’t 100% guarantee that your furnace won’t have any issues over the winter, it ensures you’re as prepared as you can be. Think of winter as a test—you’re better off passing if you study. A furnace tune-up is just like that.

Extend the life of your furnace with Althoff Industries.

Your furnace should last for many years with good maintenance. If you’re in the Greater Chicago area and need a furnace tune-up, inspection or repair, contact the expert technicians at Althoff Industries. Schedule your furnace service online or give us a call at (815) 455-7000.

Continue Reading